With Christmas two days away, it’s the final stretch of holiday preparation around here. I must admit that I haven’t started gift wrapping yet and have quite a few projects to wrap up before Christmas. These ornaments are easy and simple DIYs to complete. With only a few supplies, they’re easy to make and are the perfect gift toppers for wrapping. It adds a special personal touch and beautiful presentation to what you wrap.
Keep reading for the full how-to after the jump!
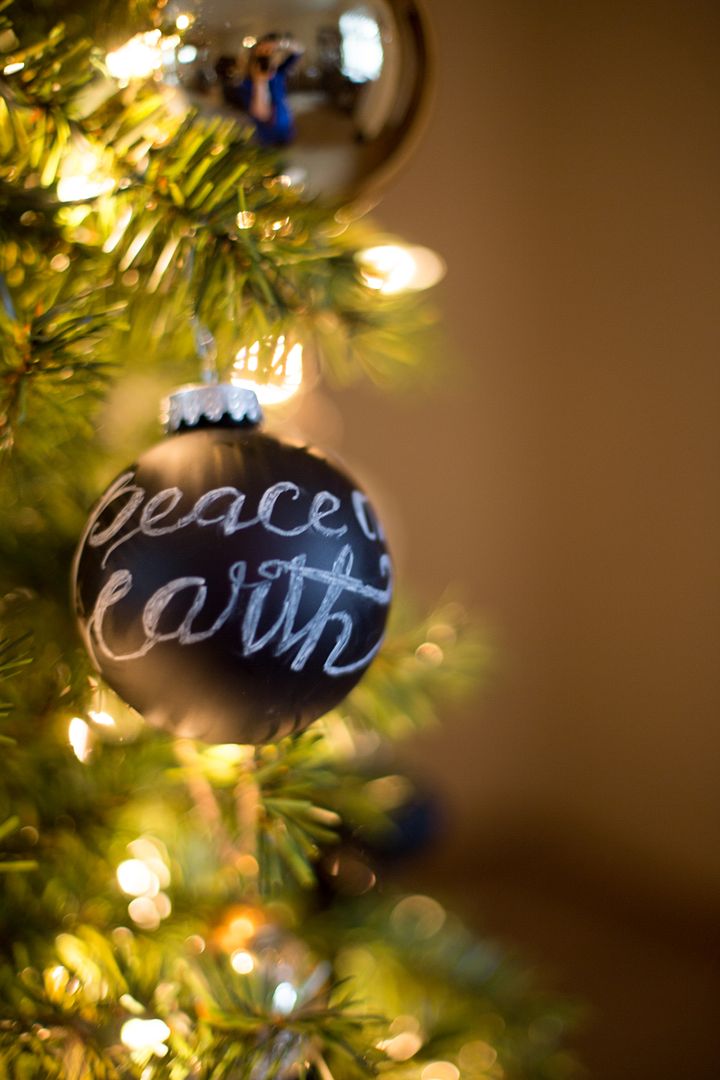
Chalkboard Typography Ornaments
Supplies:
Chalkboard paint
Clear glass or plastic ornament
Foam brush
Chalk
Directions:
Begin by painting the ornament with chalkboard paint. Apply two thin coats. Allow to dry. Once paint is dry, season with chalk. Pick phrases you like and sketch out what you want the type to look like with pencil and scrap piece of paper. Use chalk and fill in the typography. If you want to keep your work from year to year, apply a coating of hairspray or a fixative you have on hand.
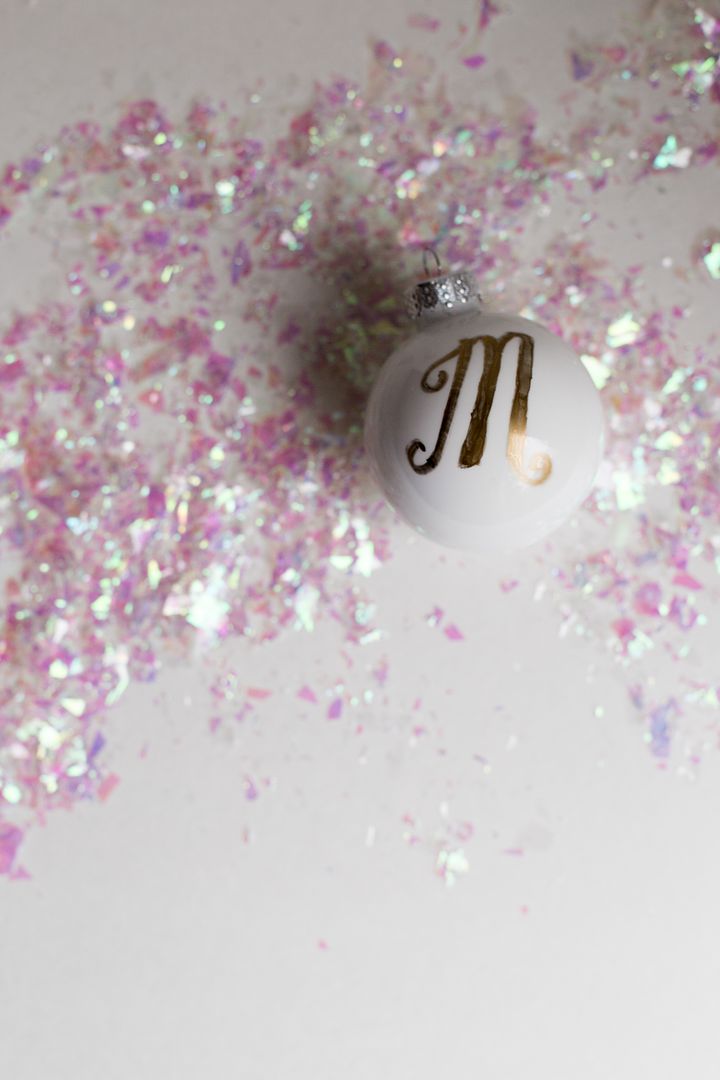
White Initial Ornaments
Supplies:
Clear ornaments
White acrylic paint
Gold Sharpie
Directions:
Using acrylic paint, pour white paint into the top of the clear ornament. Tap the side of the ornament and swirl the paint to get an even coat of paint. With a gold Sharpie, add cursive letters to the outside of the ornament. Allow to dry overnight and attach ribbon to use.

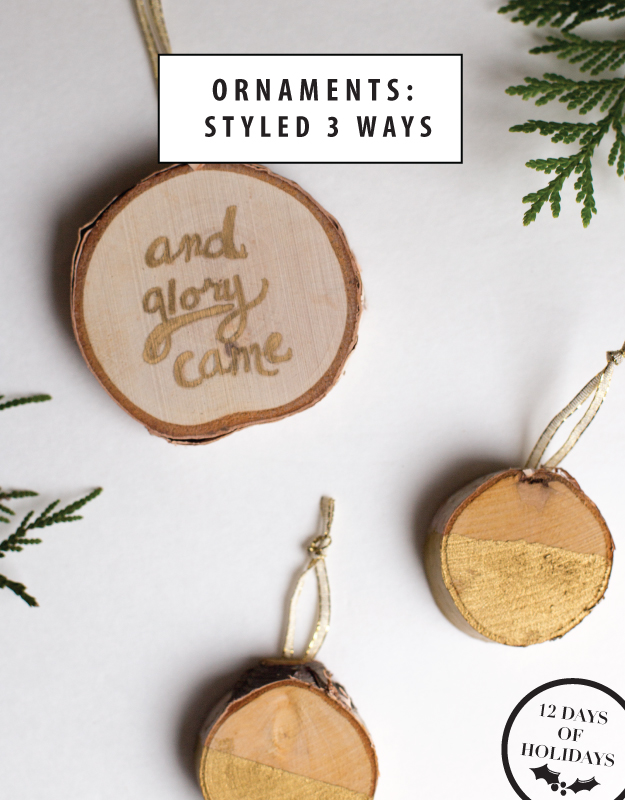
Wood Slice Ornaments
Supplies:
Wooden slices
Hot glue gun
Hot glue sticks
Gold ribbon
Masking tape
Gold sharpie
Gold paint
Paint brush
Directions:
For the gold dipped wood slice ornaments, mask off half of the wooden slice with tape. Using a paintbrush, apply gold paint to the bottom portion of the slice. Attach a ribbon with hot glue. Paint other side of ornament when the front side is dry. For the typography ornament, sketch out your lettering in pencil. Using gold sharpie, add the type to your design. Attach the ribbon with hot glue.