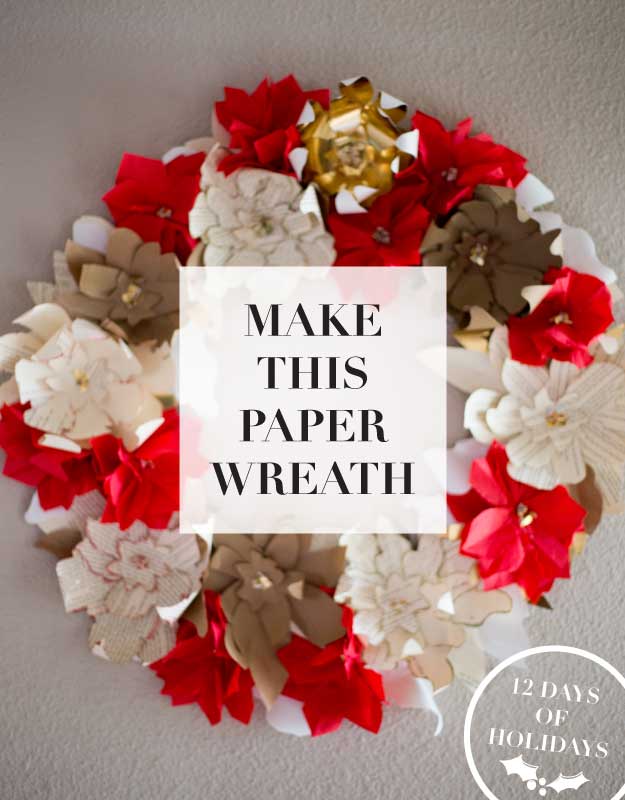
Every year I love to add a few unique and personal touches to my holiday decor. After moving cross-country, my holiday decor started with a blank slate. I knew I wanted something that felt timeless and modern, had a large visual impact and would be affordable to create. This wreath ended up being the perfect solution. With a few dollars and hours, this project was easy to make and well worth the time and effort spent. It is the focal point in our entryway over the console table, and warmly greets our guest as they walk into our living room.
Supplies:
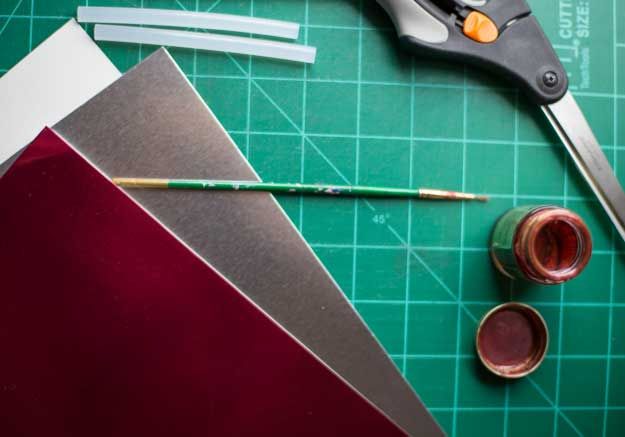
- Various papers (I used book pages from old books, kraft paper, and a plain white wrapping paper. All of these were items I had on hand)
- Metallic posterboard (I purchased mine from the dollar store)
- Red cocktail napkins (purchased from the dollar store)
- Hot glue and hot glue gun
- Liquid Gold Leaf paint
- Paintbrush
- Scissors
- Utility knife
- Large piece of cardboard
- Pencil and string or large round object
- 1 yard of white string
Instructions:
Step 1: Begin by using a pencil and string or large round object and trace the final size of your wreath. Draw a second, smaller circle to create the center of your wreath. Using the side of the blade of your scissors or a utility knife cut out the cardboard round. This will be the form for your wreath.
Step 2: For this wreath I opted to create two different kinds of flowers and used multiple papers to add dimension. In my wreath, I used 10 large paper flowers,
For the poinsettias made out of cocktail napkins:
Fold the napkins into three triangles. Make a petal shape with the center of the petals on the fold. The tips of the petals will be the open layered edge. The center of your flower petals will be closed at the edge. Trim the petals. Open the napkin and pull apart layers into four sections. Stack the layers to cross in two piles. Stack the two piles so all the tips are showing. Fold the flower in half and create a small hole with the point of scissors. Using a small piece of string, string through hole with twine and tie a knot. Bunch up petals to form a closed bloom. Open and arrange petals and add a small ball of hot glue to the center of the petals. This will add reinforcement and dimension to the flower. Open the flower back up. Using hot glue add small balls of gold metallic posterboard to the center.

For the poinsettias made out of other kinds of paper:
Cut out 7 large petals, 7 medium petals, 2 star shaped central petals, and 2 leaves. I decided to free-hand the design. Add dimension to the leaves by rolling them around a pencil. For the star shaped central petals, place the center of the petal in the palm of your hand and squeeze the rest of the leaves. This will add some dimension the center of your flower. Using hot glue add the medium leaves in a circular formation. Then add the large petals, followed by the 2 leaves. For added dimension and shine, I used a paintbrush to add a painted gold leaf border to the edges of each petal.
For the additional leaves:
I used white wrapping paper to freehand large leaves. The leaves served as filler to cover any cardboard that was showing.
Step 3: Place your flowers around the cardboard and play with the textures and variety of paper flowers. Once you have achieved your desired look, begin to glue the flowers into place.

Let’s make something together!