
Every year I am torn. I look across my Pinterest, Instagram feeds, and various blogs that I follow and long to have the perfect thanksgiving table. But how do you create a beautiful seasonal arrangement without spending $50 on flowers and supplies? Other than foraging, one of my favorite solutions to this problem is going to the produce section. Incorporating fresh produce into an arrangement makes it look natural, fresh, and elegant without feeling overdone. The best part? You can eat the items later. For this arrangement, I used various winter squashes and gourds. Once I’m ready for the table to look like Christmas, I can use these in a delicious soup or pasta.
Keep on reading to see how I made this full centerpiece using a few items from the grocery store.
Supplies:
- Kitchen shears
- 4 small kitchen glasses
- Tape
- Mini pumpkins and winter gourds
- Greenery (I used a bunch of safari blossom from Trader Joes’s)
- White Freesia
- A mixed bouquet with large blooms (I opted for sunflowers with white button mums)
- Wooden planter box (I purchased mine from Joann’s)
- Leftover coffee grounds and coffee
- Paint/pastry brush
Instructions:
To begin I decided to stain my unfinished wooden box. I was wanting a rustic finish but didn’t want to go through the mess and additional purchase of using a wood stain. I opted to use leftover coffee and the grounds to stain the wood. This causes a subtle stained finish and removed the yellow tint of the unfinished wood on the box. I used a paintbrush to wash over the wood and continued in coats until I achieved the color I desired. After using the wash of coffee, I still wanted the wood to look a bit more aged than it was. Using a hand full of leftover coffee grounds (mine were still wet from the morning’s cup), rub the grounds into the wood in a circular motion, until achieving the desired effect. This will cause the wood to look more worn and rustic. Brush off the excess grounds and set aside to dry.
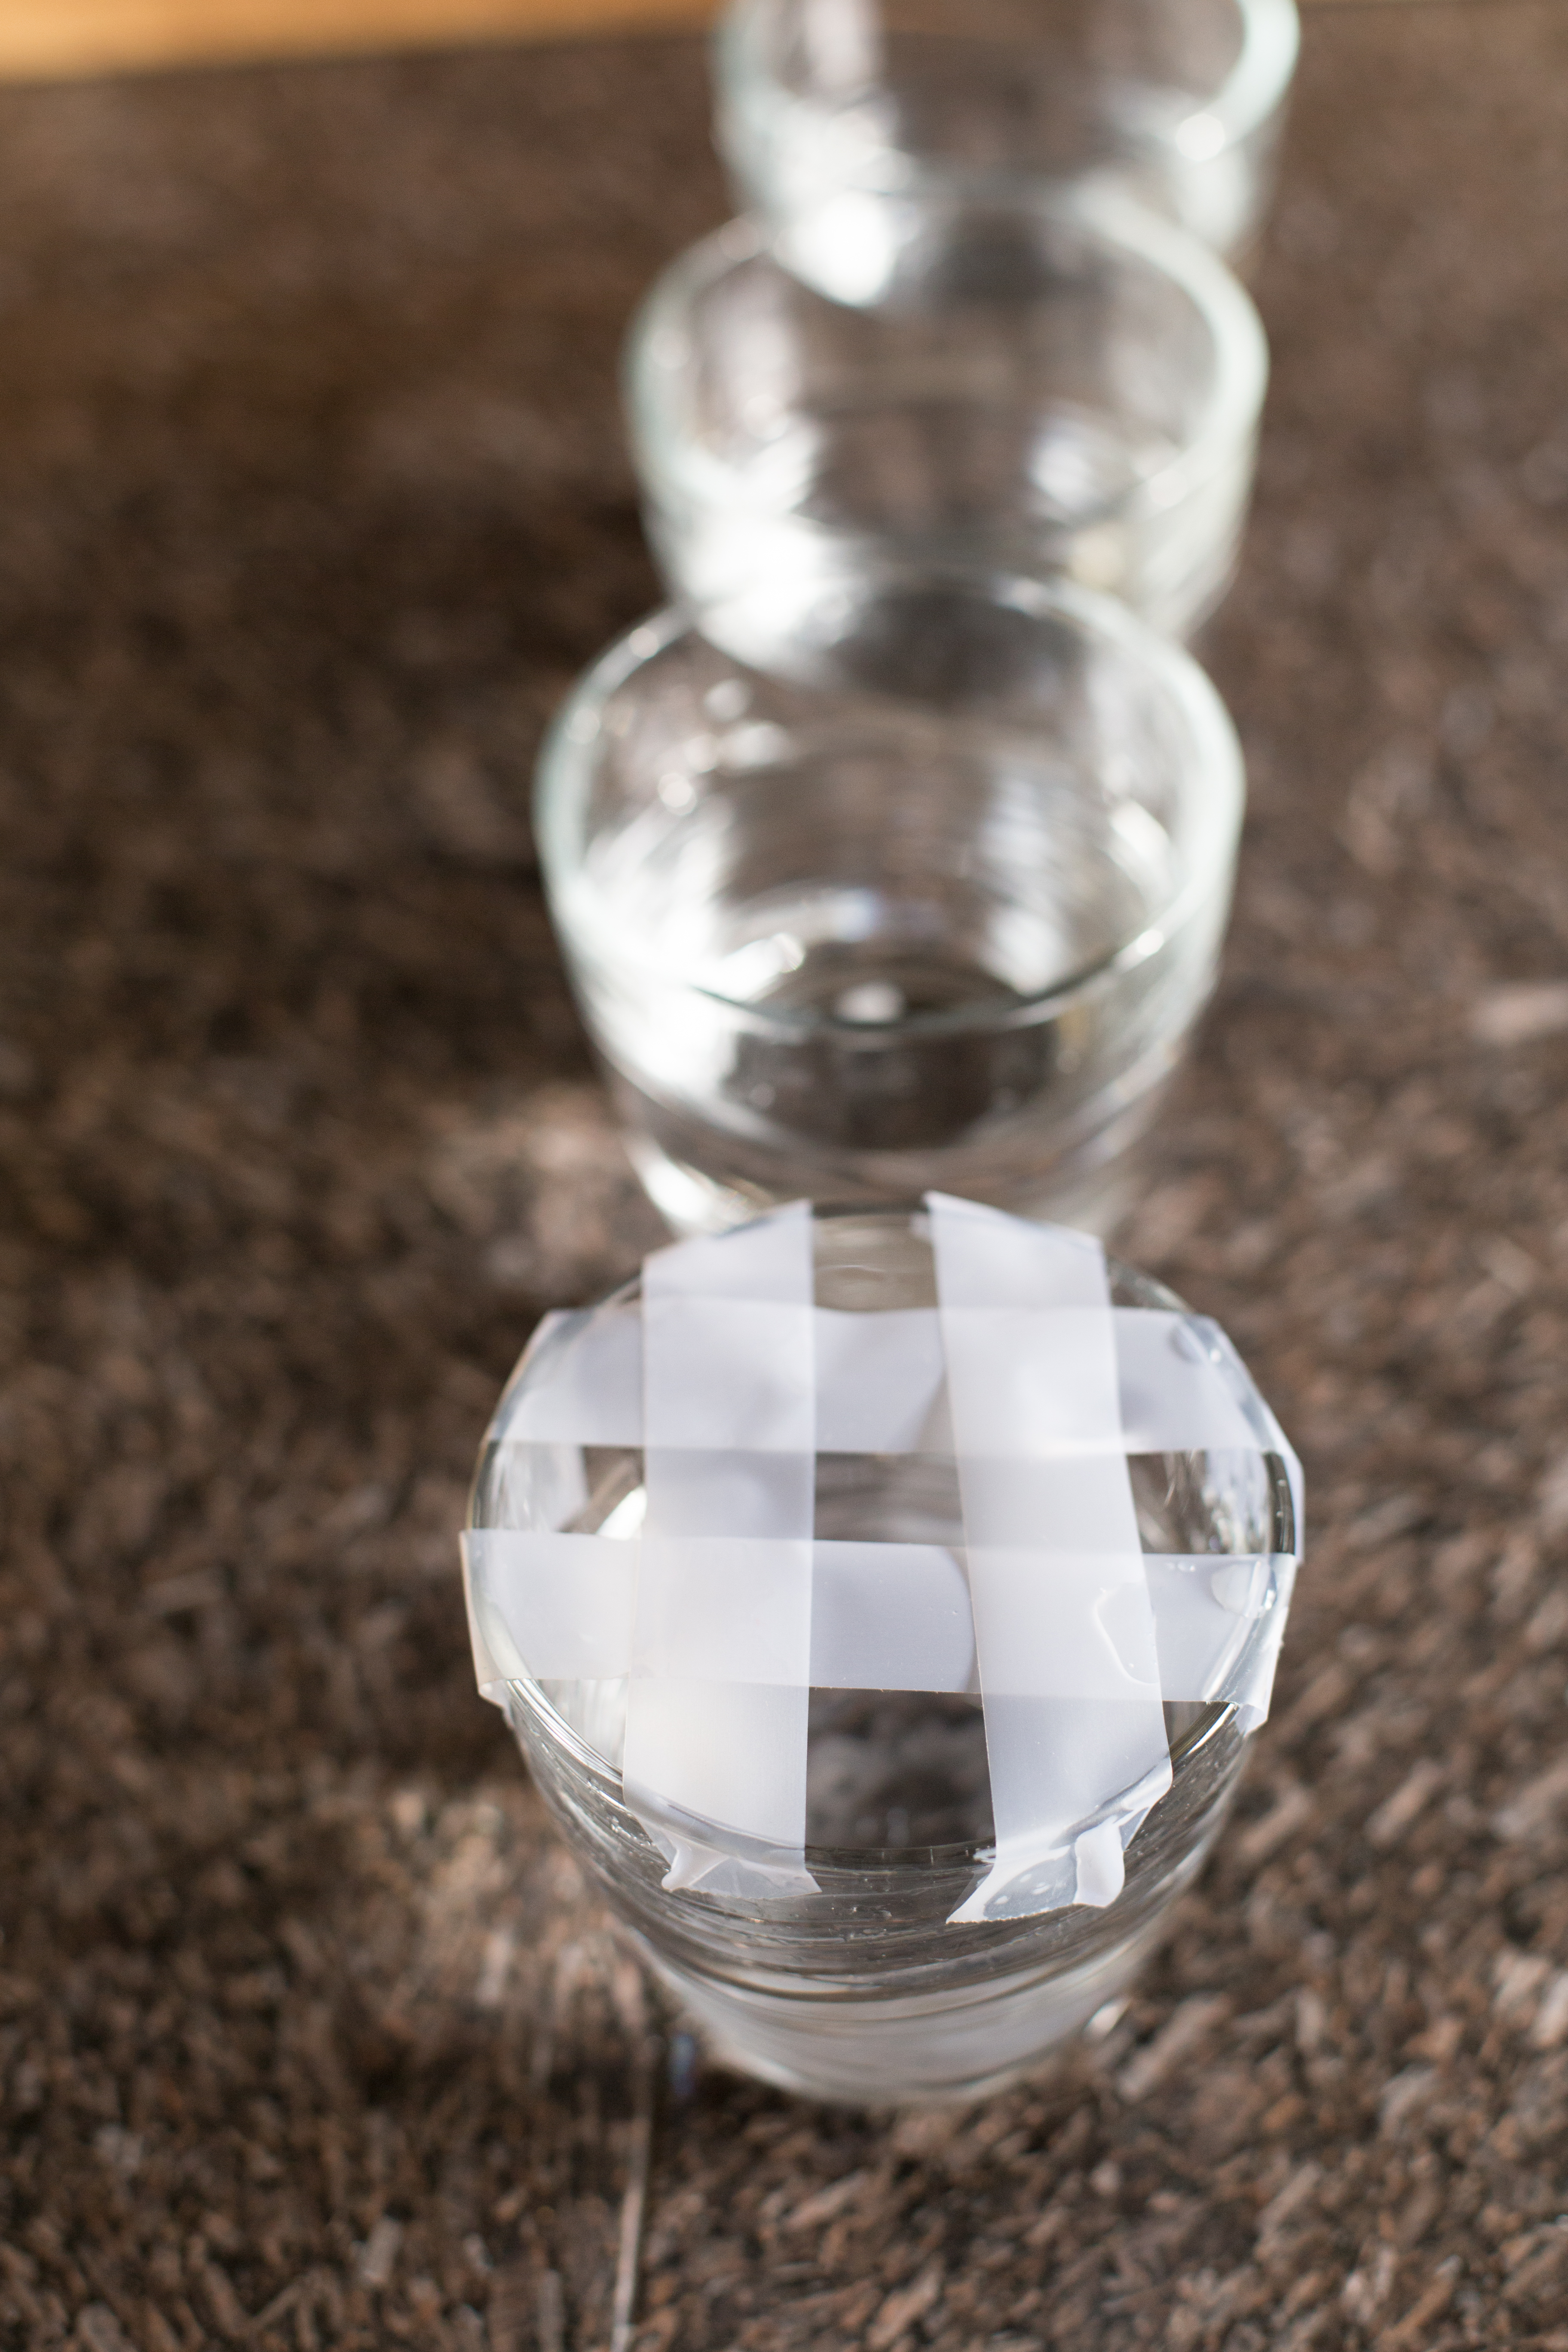 Next, fill the four glasses 3/4 full with water and flower food that come with the flowers. Then, I placed tape on the rim of the glasses in a grid pattern. The slimmer the tape you can find the better. This was a tip I learned a few years ago and it has made a huge difference in the way my flowers look. When you use this trick you don’t have to worry about flower foam, wires, or picks, and the flowers will stay in place.
Place the glasses of water in the wooden box. Add the guards and pumpkins to the arrangement. I balanced mine where the wood and glasses of water met. 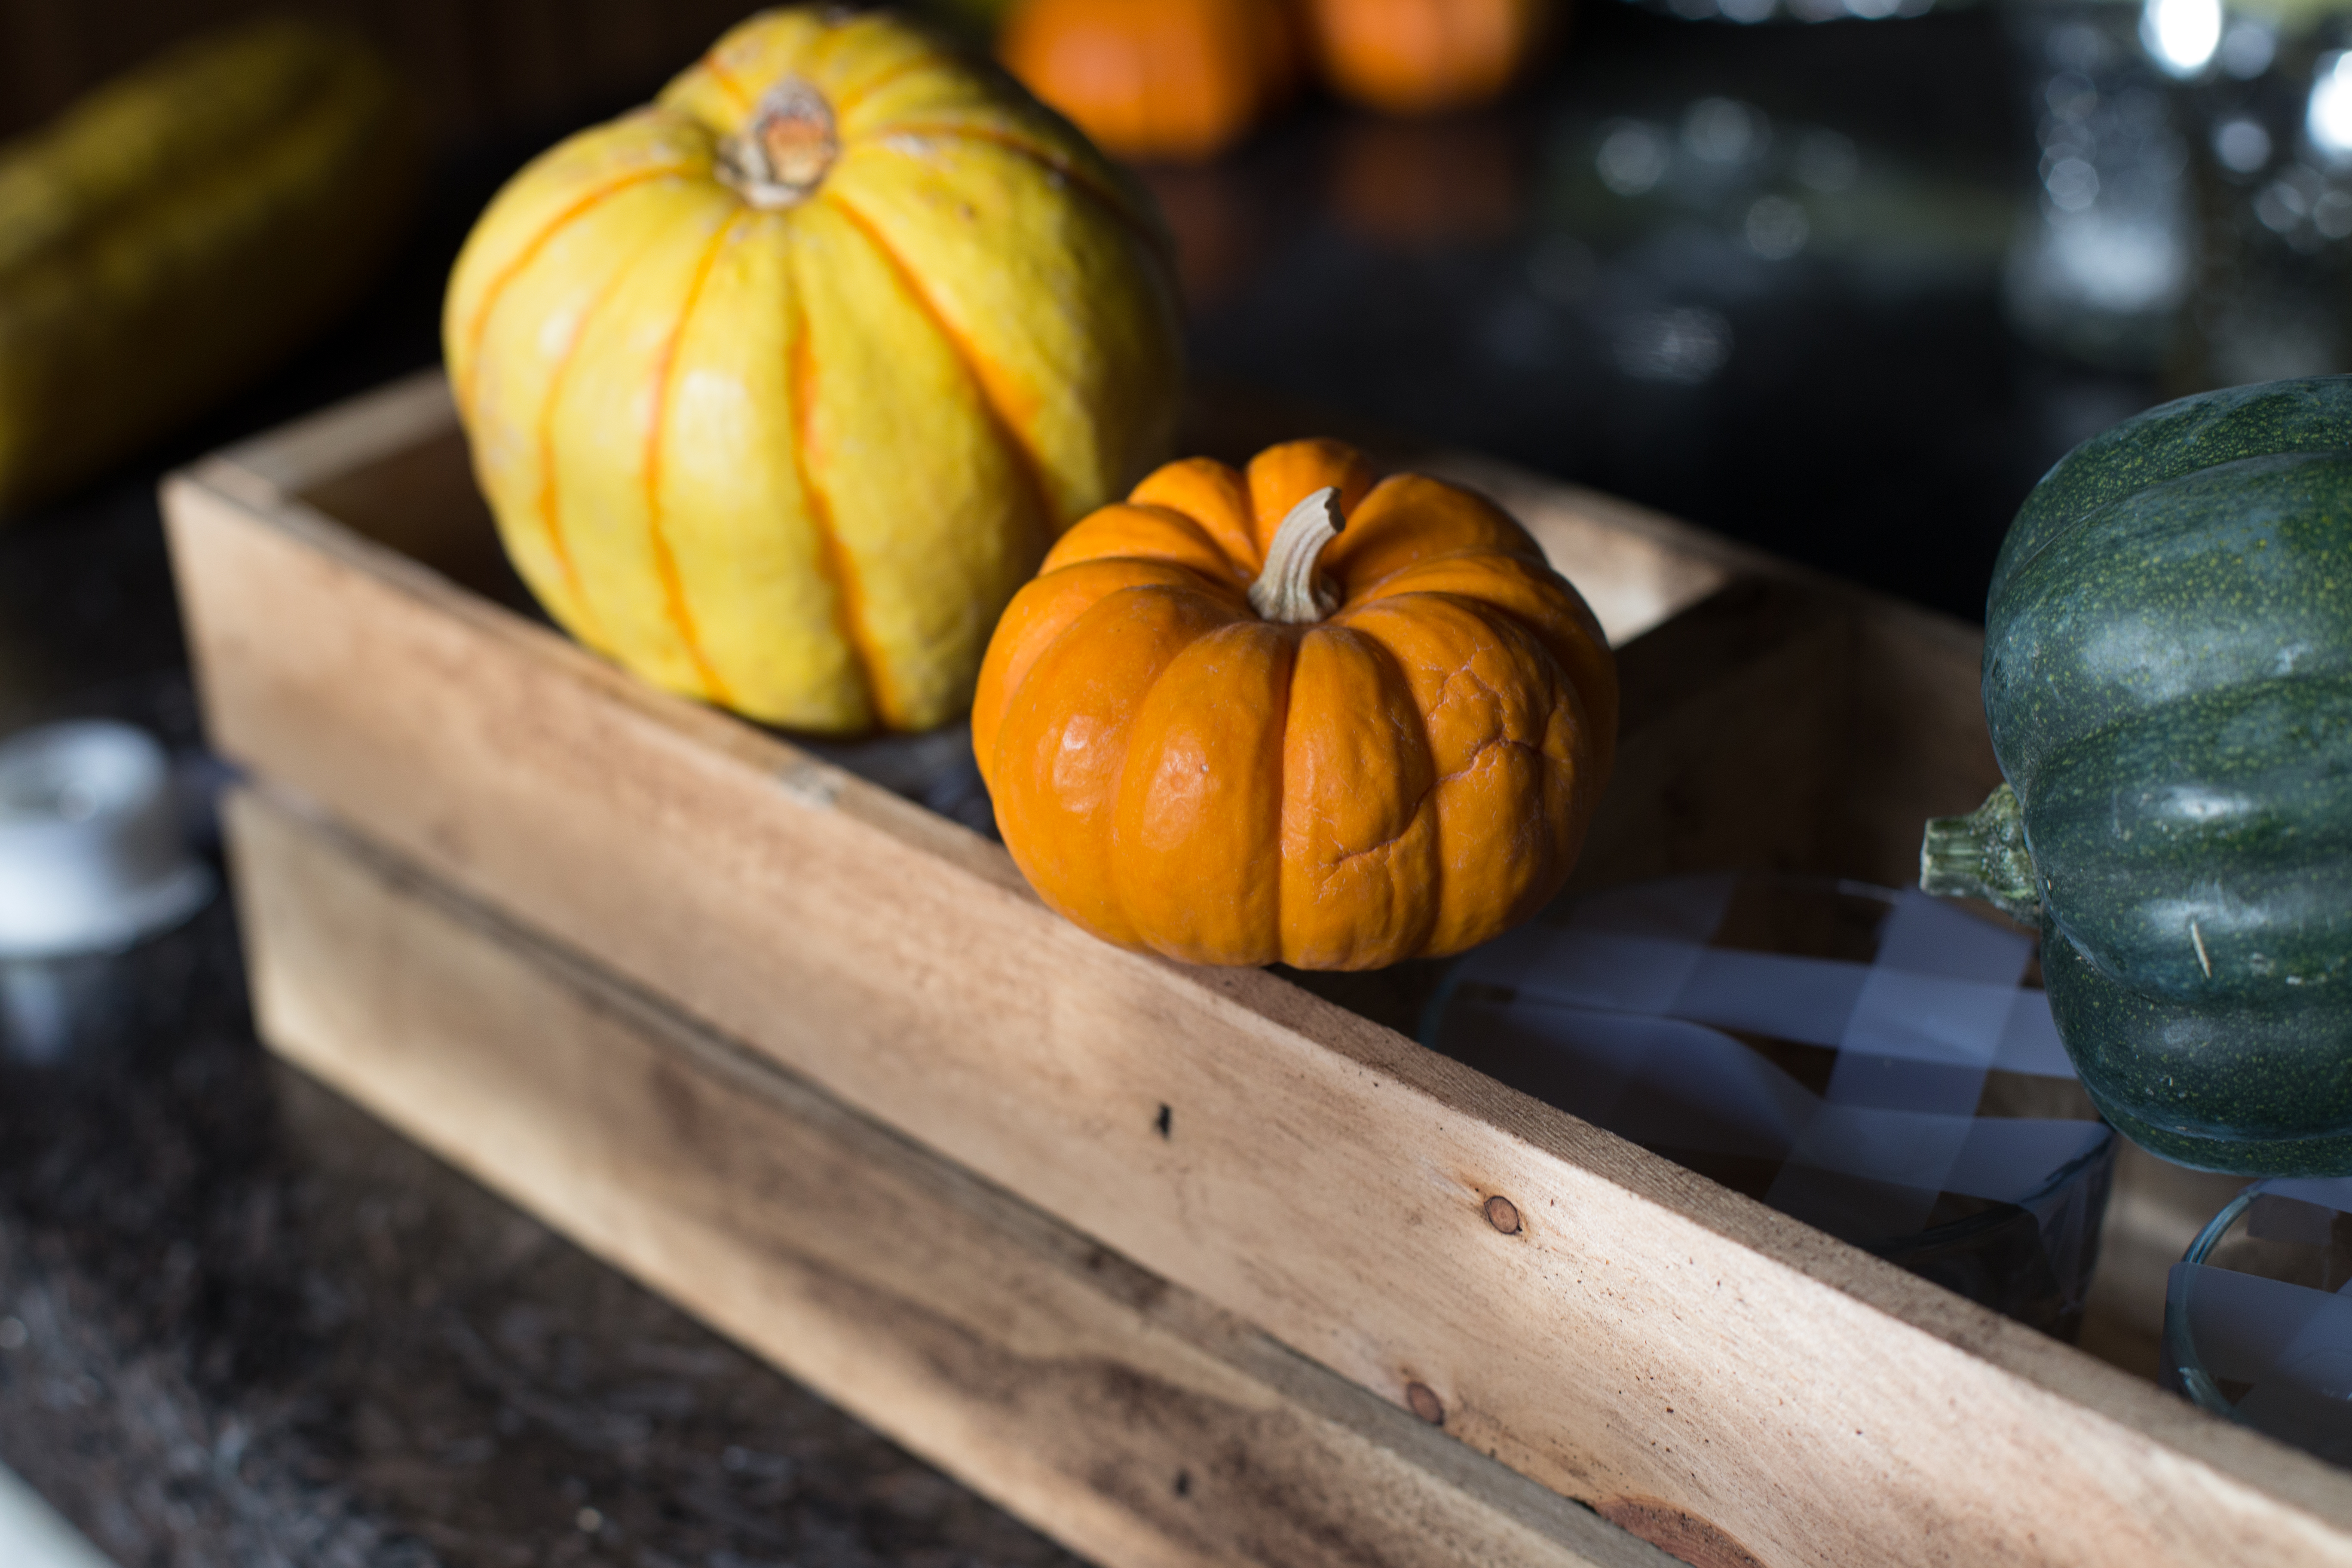
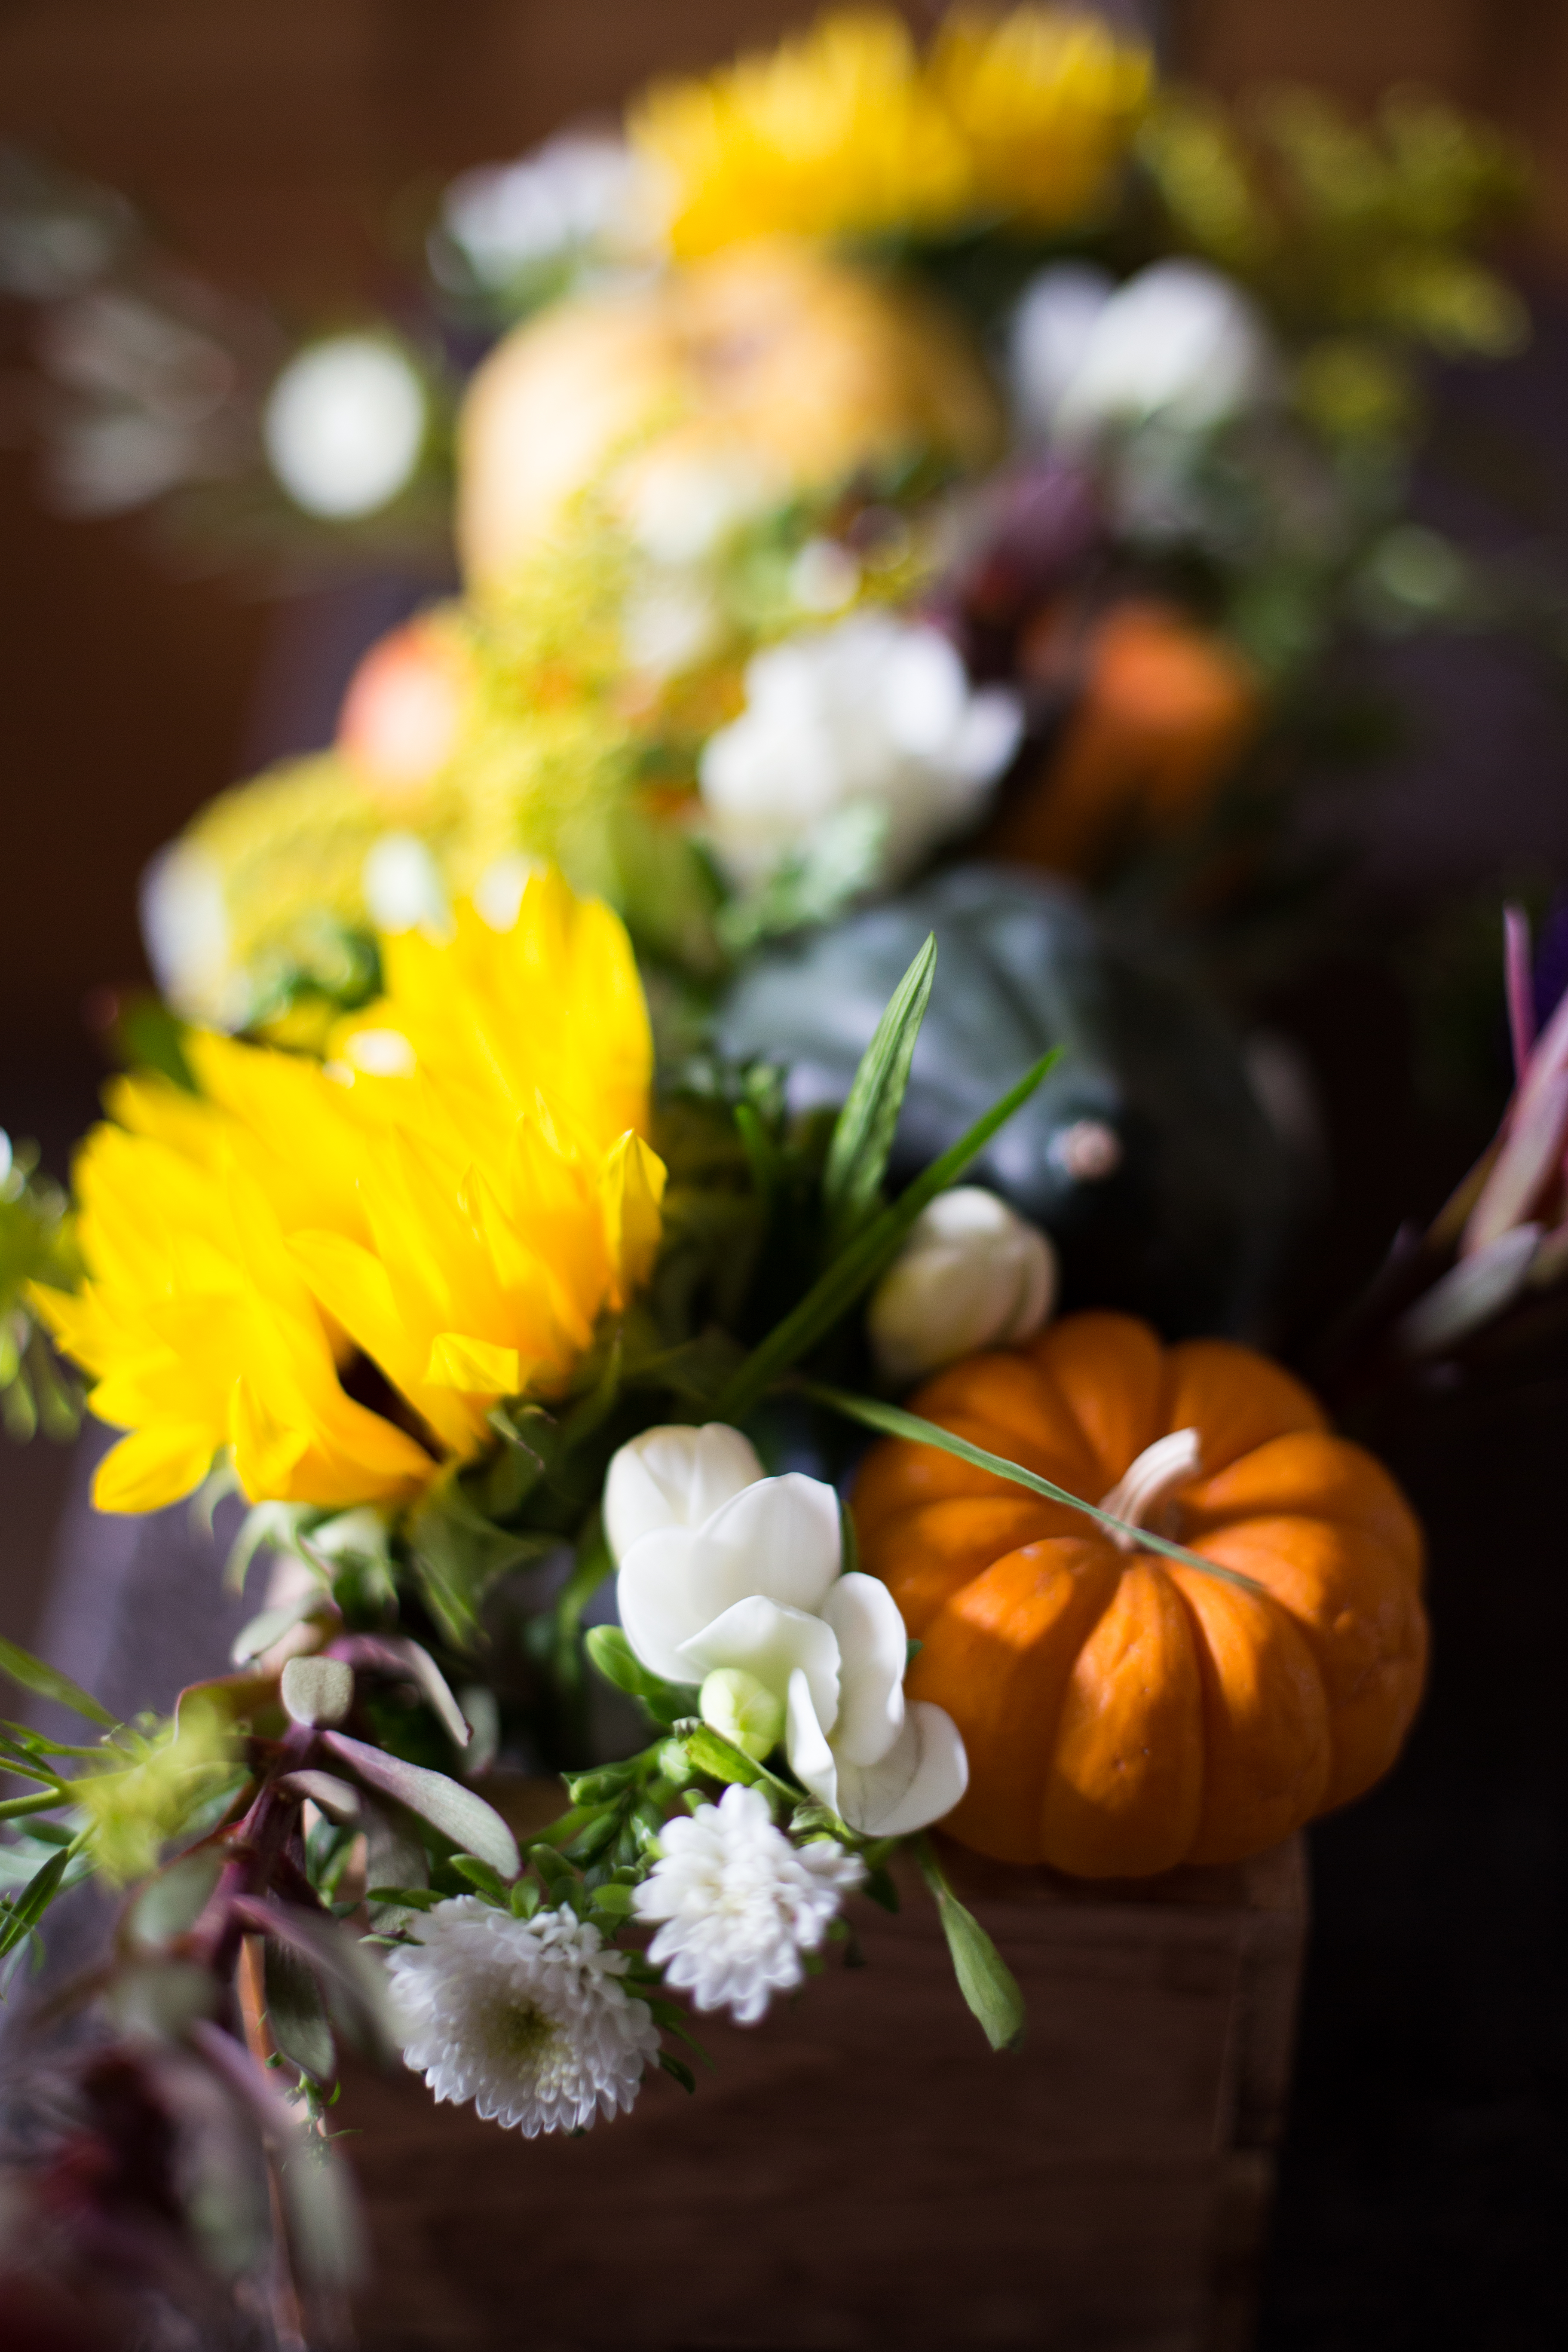
Next place in your long pieces of greenery. I used safari blossom and placed them at an angle allowing for the greenery to naturally extend past the wooden box. Then add in your various small blooms. I opted to buy a mixed bouquet that featured goldenrod, button mums, and sunflowers, as well as a separate bunch of white freesia. I began by placing in the goldenrod, then the mums, then the freesia. Finally I added the sunflowers to fill in the largest wholes and to ensure a beautiful, balanced composition in the arrangement.
Want to see how the table looks together? Click here.
What are some of your favorites to feature in seasonal arrangements?